Microsoft Teams
This section describes how to deploy your AI Agent in a Microsoft Teams Team or in Microsoft Teams at organizational level.
Deploy an AI Agent in a Microsoft Teams Team
This section describes how to deploy AI Agents in a team with MS Teams using the Developer Portal. For information on other options you’ve got for MS Teams integration, see Microsoft documentation.
Prerequisites
Before configuring the MS Teams channel, ensure you have:
- A published AI Agent.
- A MS Teams account.
-
Microsoft Bot Framework enabled on your tenant (for Druid hybrid and cloud deployments).
- For DRUID hybrid and cloud deployments, the MS Teams channel requires the Microsoft Bot Framework. You can configure the channel only if the Bot Framework is enabled on your tenant. If the channel configuration is unavailable – the Post Office is set to BotService (AI Agent Details → General) – contact Druid Support to enable the Microsoft Bot Framework on your tenant.
- MS Teams channel integration is not available for Druid on-premise deployments.
Deploy your AI Agent in MS Teams
Step 1. Active MS Teams channel in Druid
- Log in to the Druid Portal and select your AI Agent.
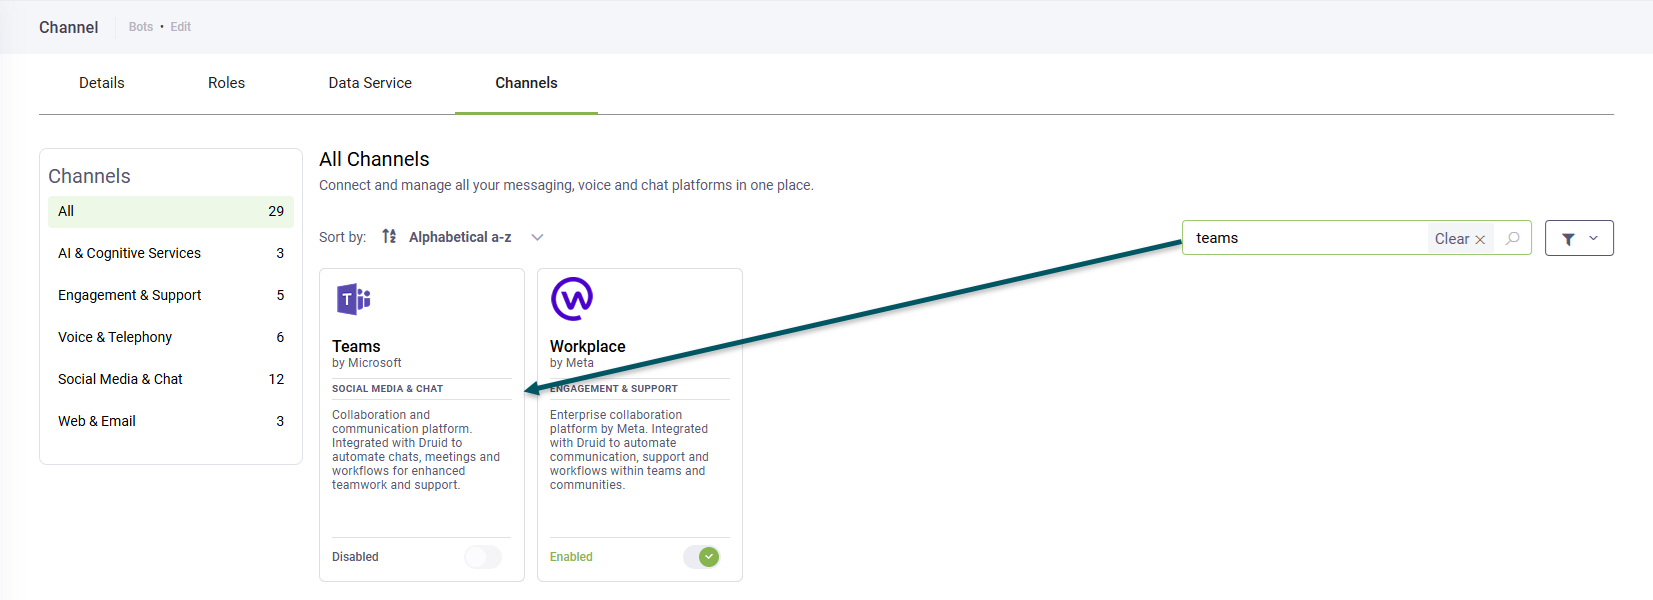
- Click the Channels tab.
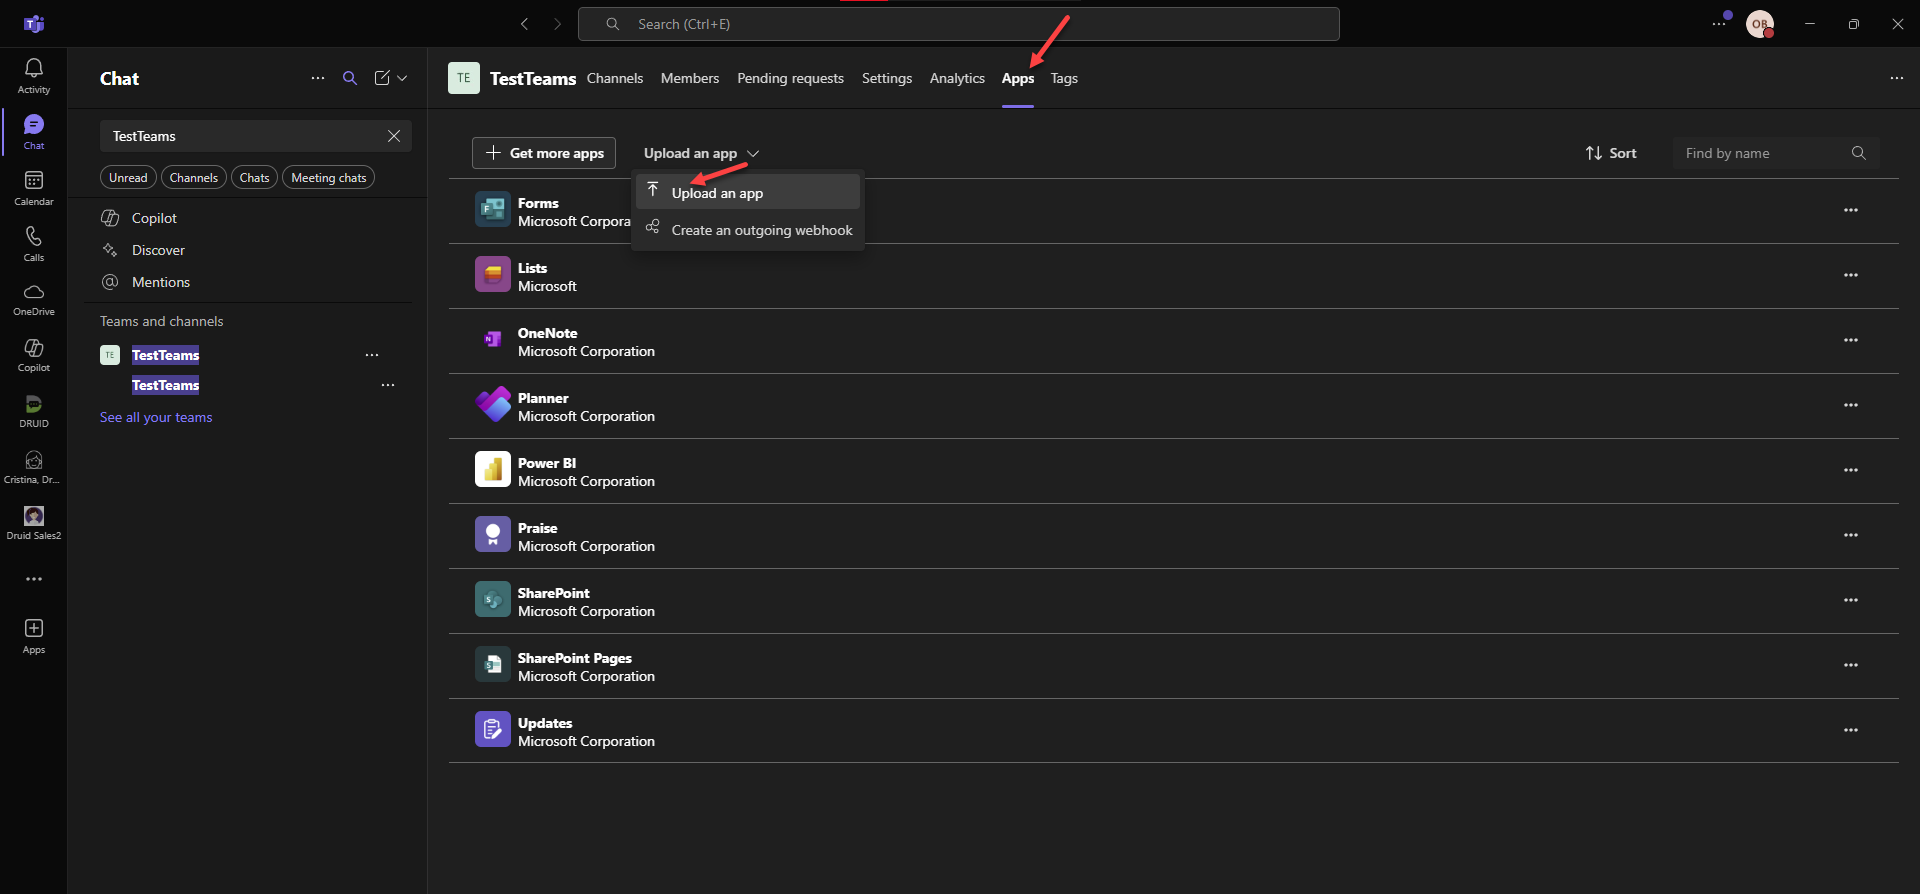
- Search for 'teams' and click the MS Teams card.
- The channel configuration modal appears.
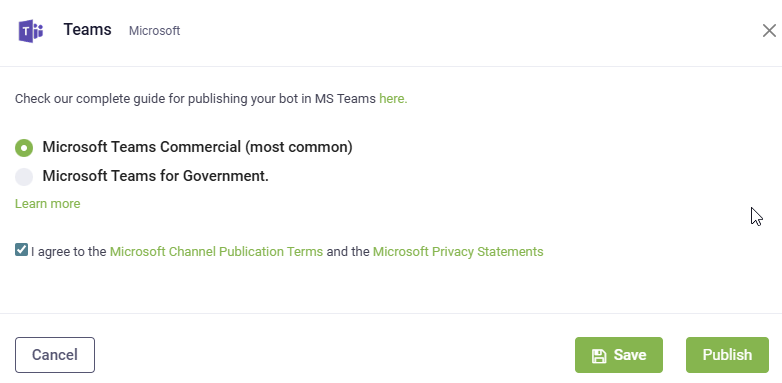
- Select the Microsoft Teams option that suits your company's Microsoft Office 365 version, agree to the Microsoft terms and statements and click Publish.
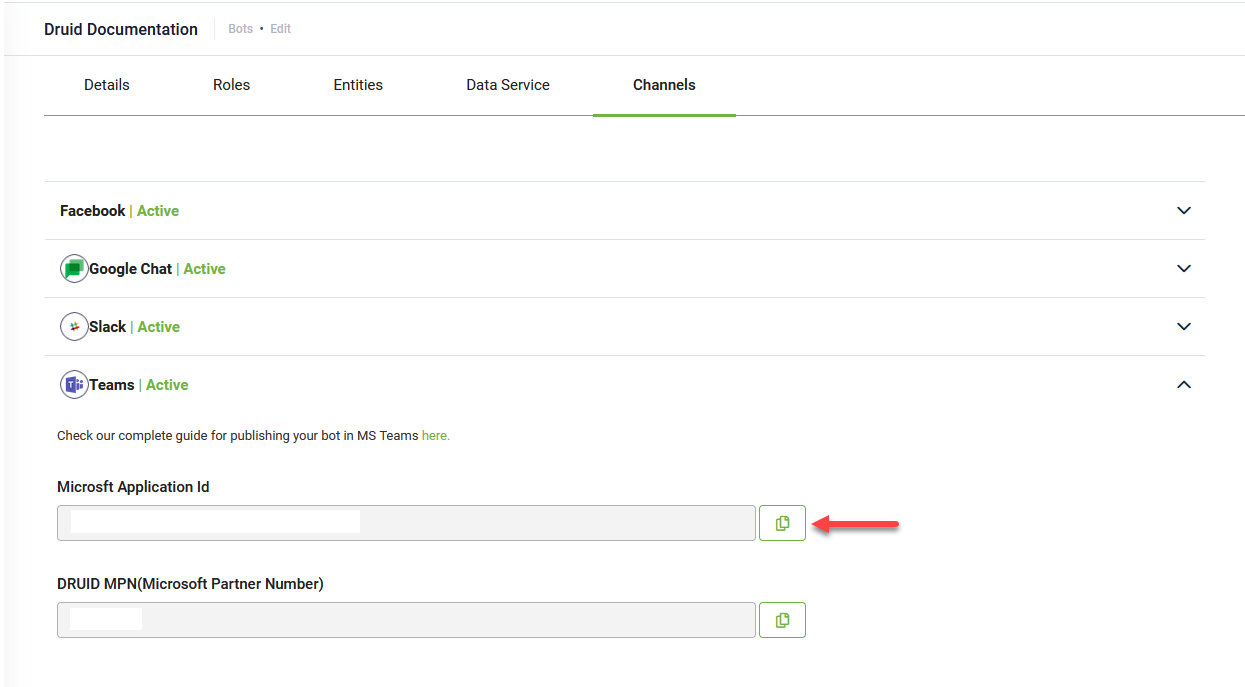
- Copy the Microsoft Application Id as you will need the value at the next step.
The channel activation might take up to 1 minute.
When the channel activation completes, the Microsoft Application Id field is automatically filled in. This is the MS Azure ID associated to your AI Agent.
After the channel activates, Druid automatically provisions the following [[ChatUser]] parameters in the conversation context:
- [[ChatUser]].ChannelId = "msteams"
- [[ChatUser]].UserId - Stores an unique identifier of the MS Teams user account.
- [[ChatUser].Email
- [[ChatUser].FirstName
- [[ChatUser].Lastname
- [[ChatUser].DomainUserName
Step 2. Create a bot using Developer Portal and download the app package
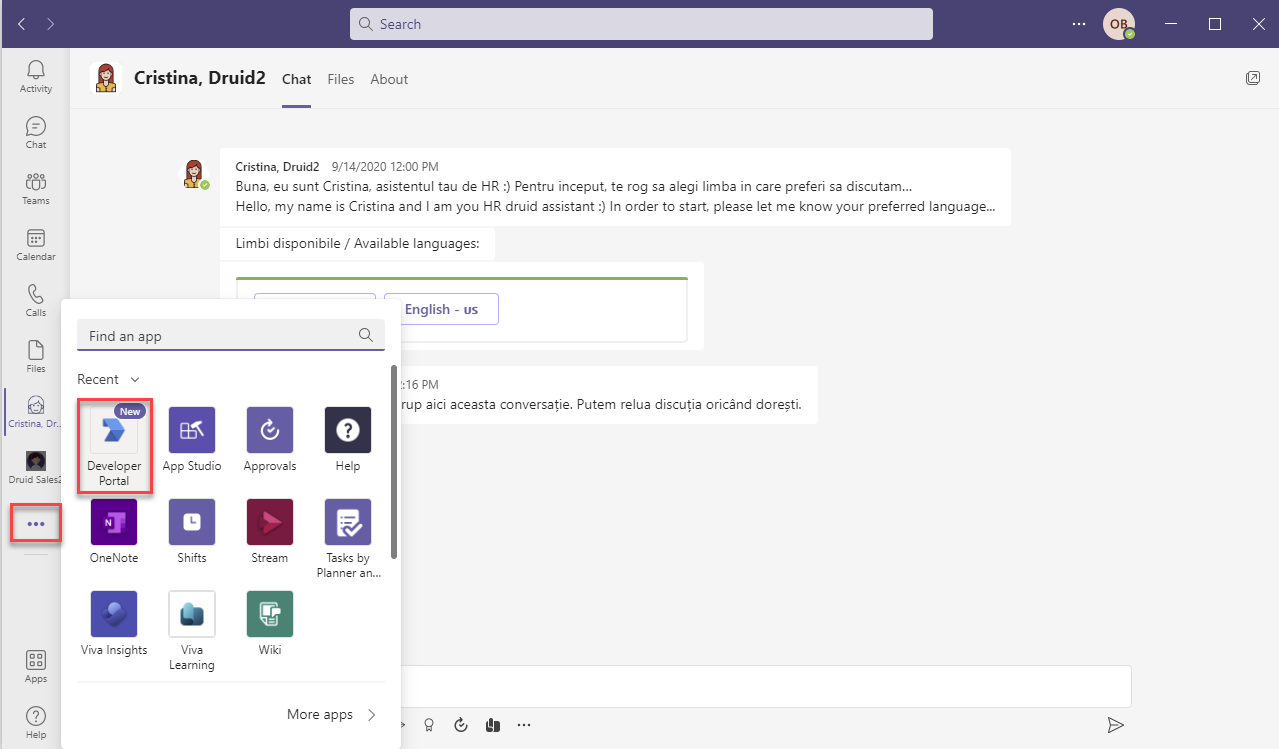
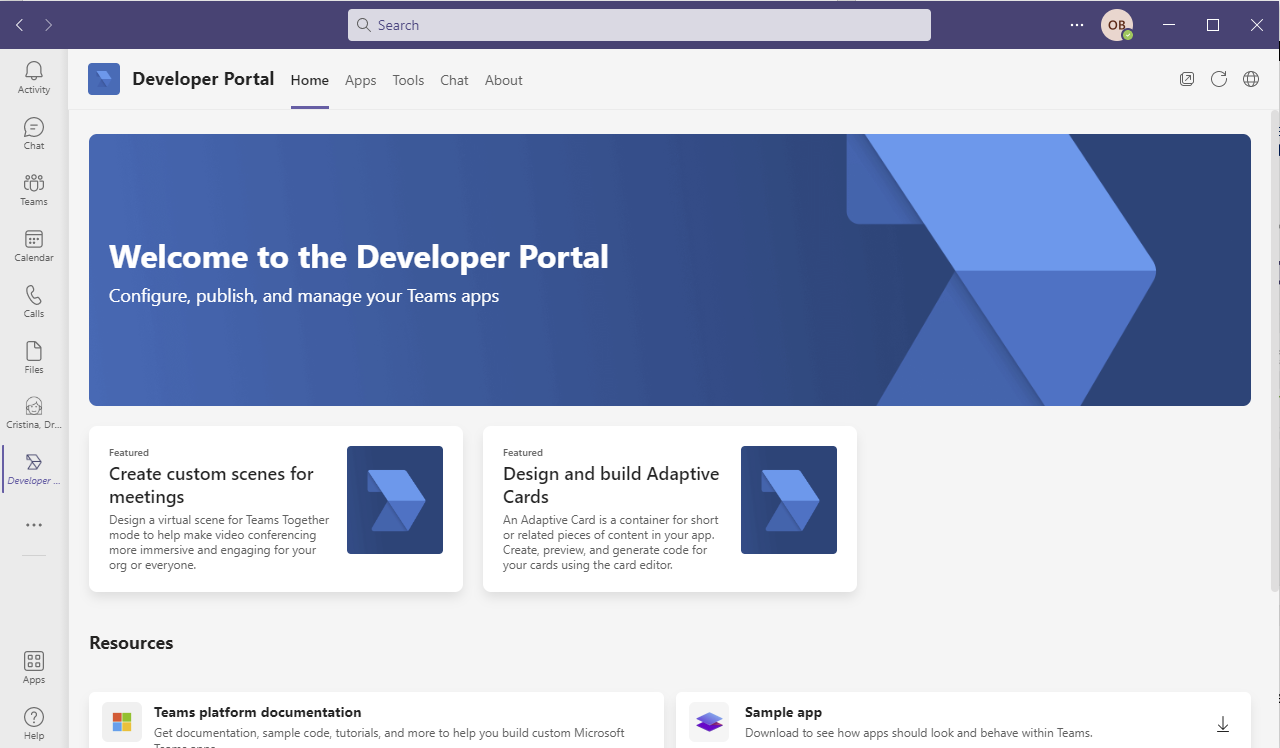
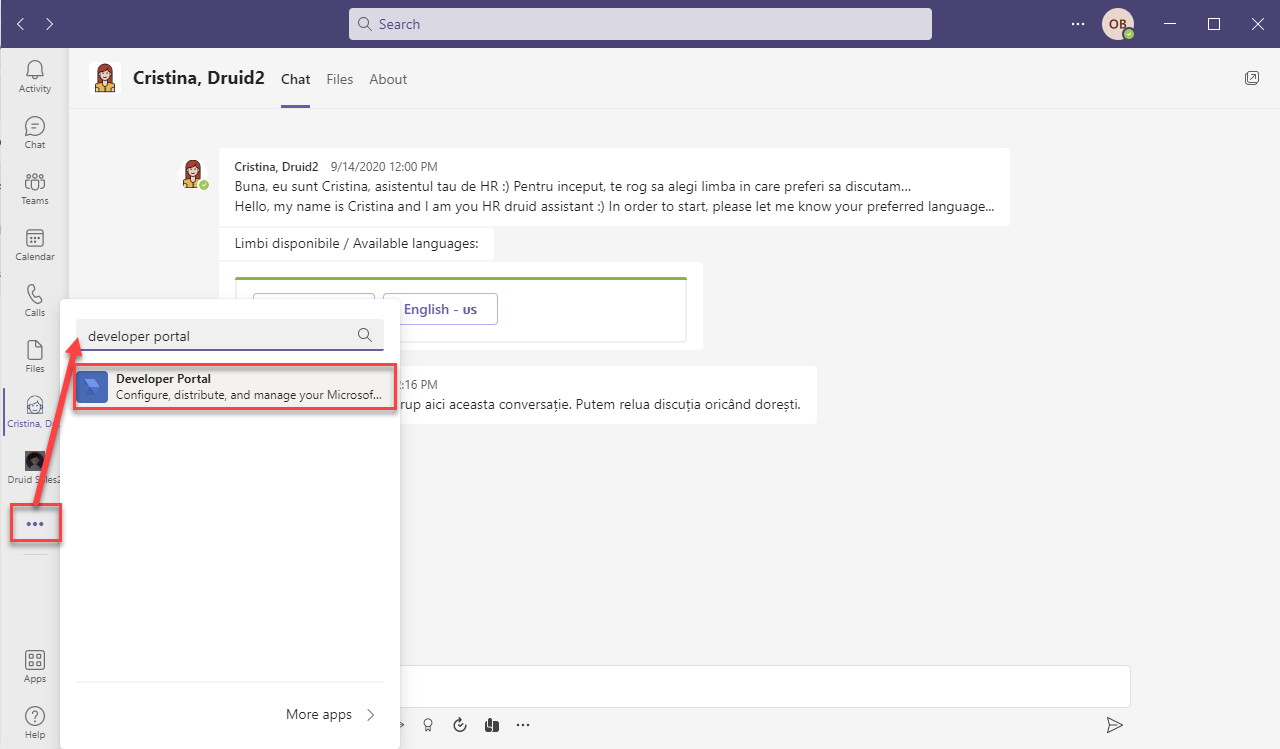
- In the Teams client, open the Developer Portal. From the ... overflow menu on the left, click Developer Portal.
- Search for Developer Portal.
- Click on Developer Portal.
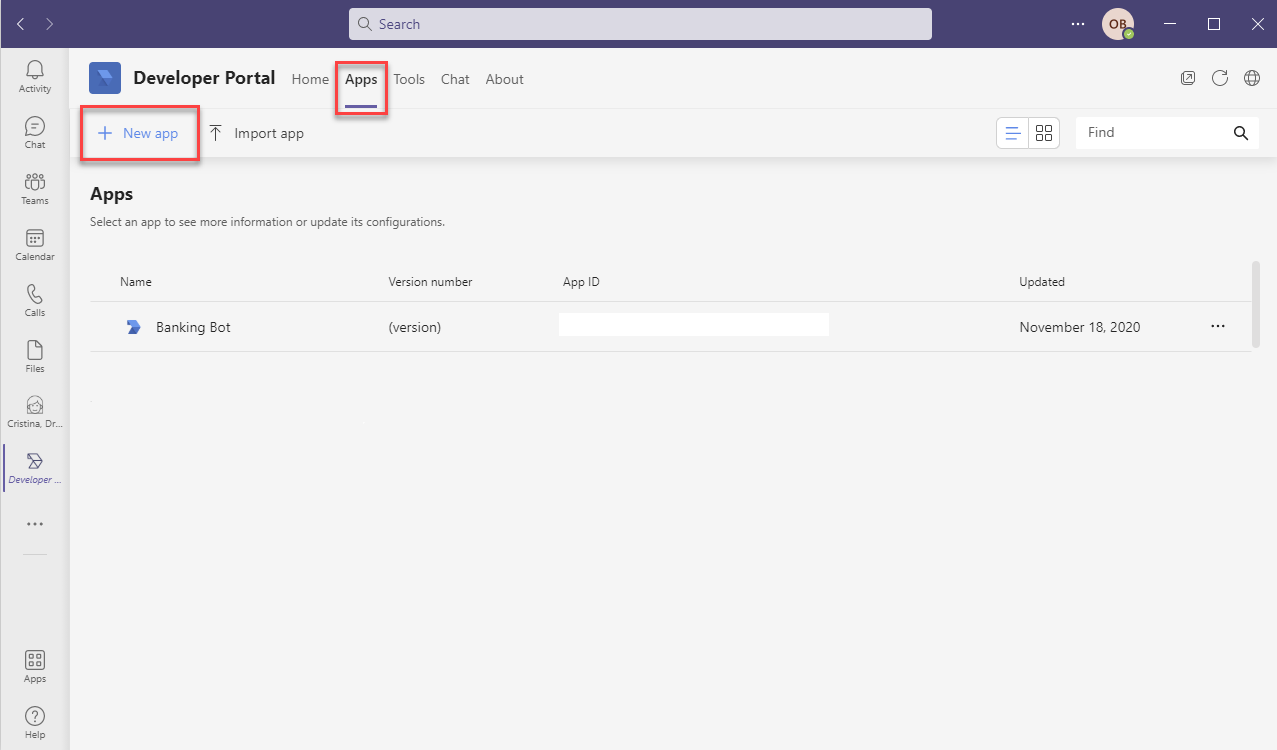
- Click the Apps tab, then click New App.
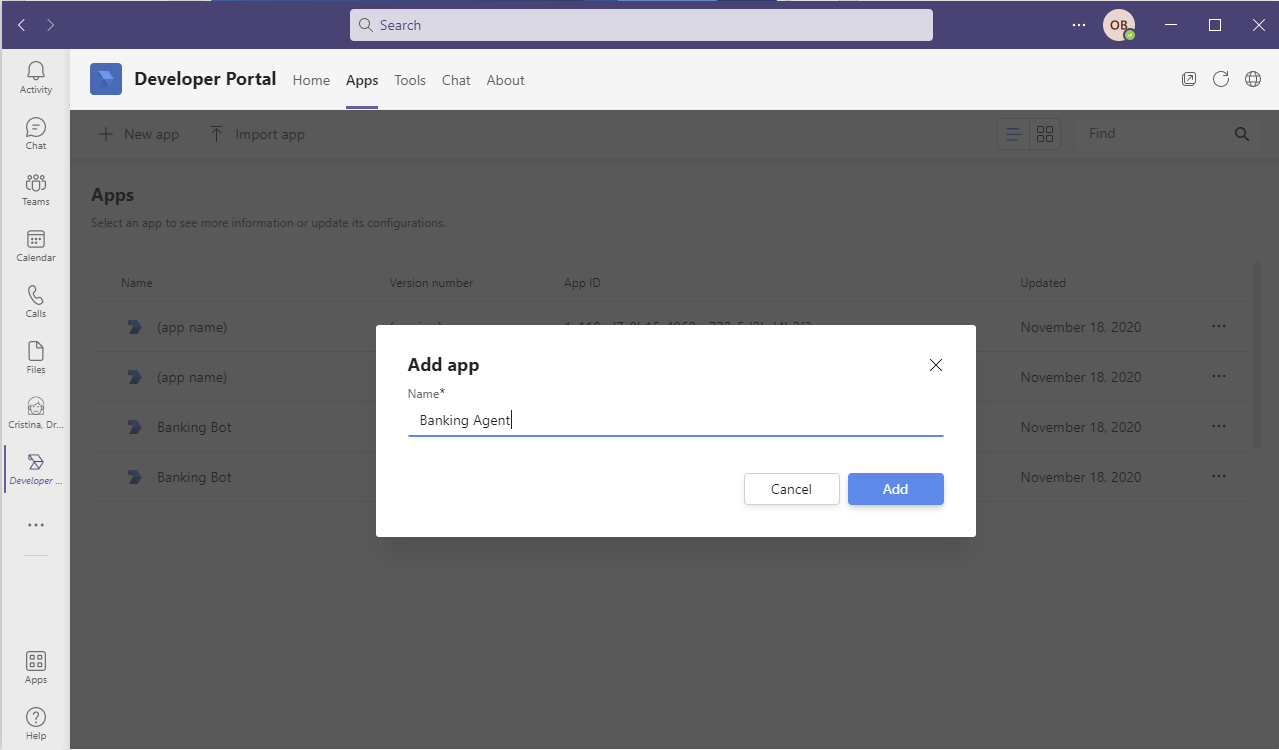
- Type a name for your app and click Create.
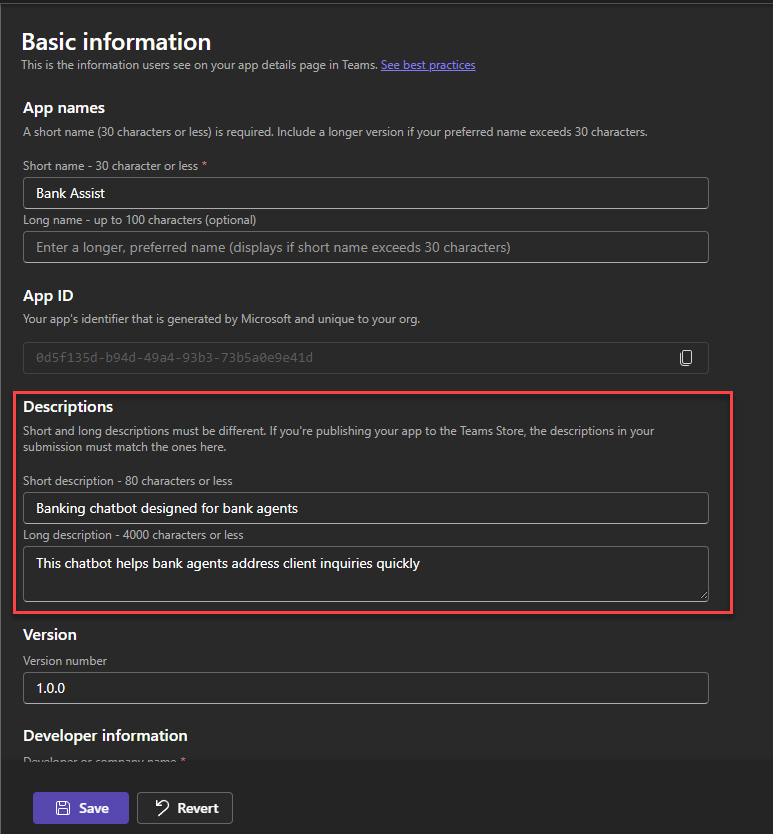
- On the Configure menu, click Basic Information.
- Provide your app details.
- Click Save.
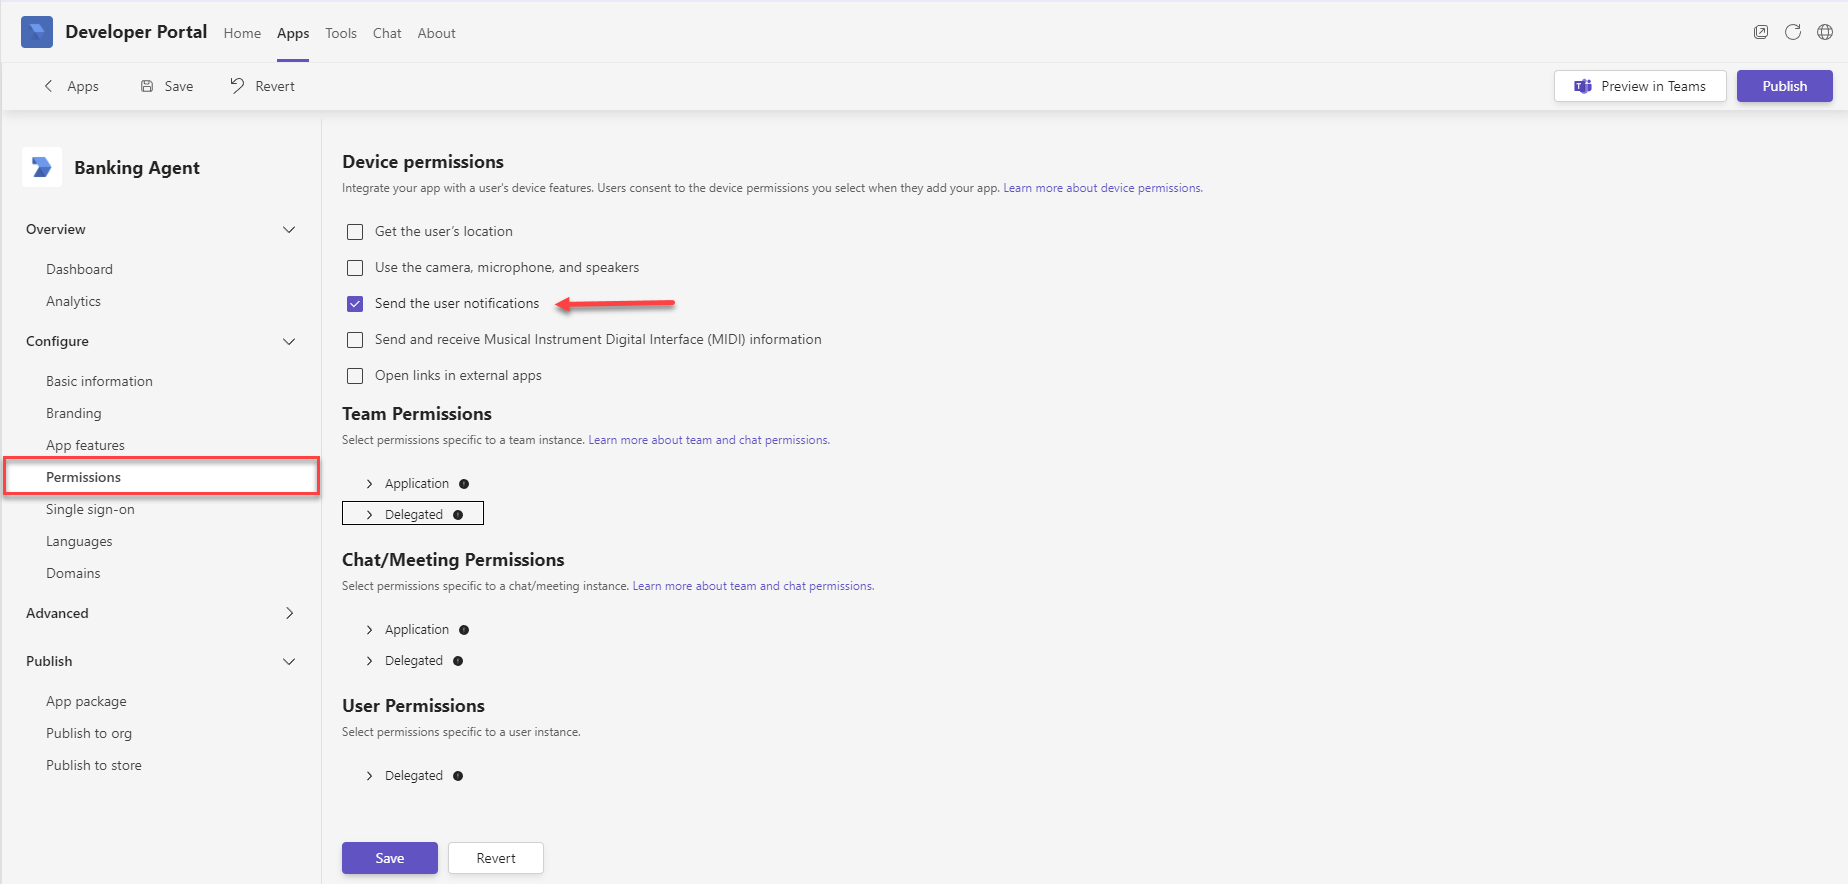
- On the Configure menu, click Permissions and under Device Permissions, select Send the user notifications.
- Click Save.
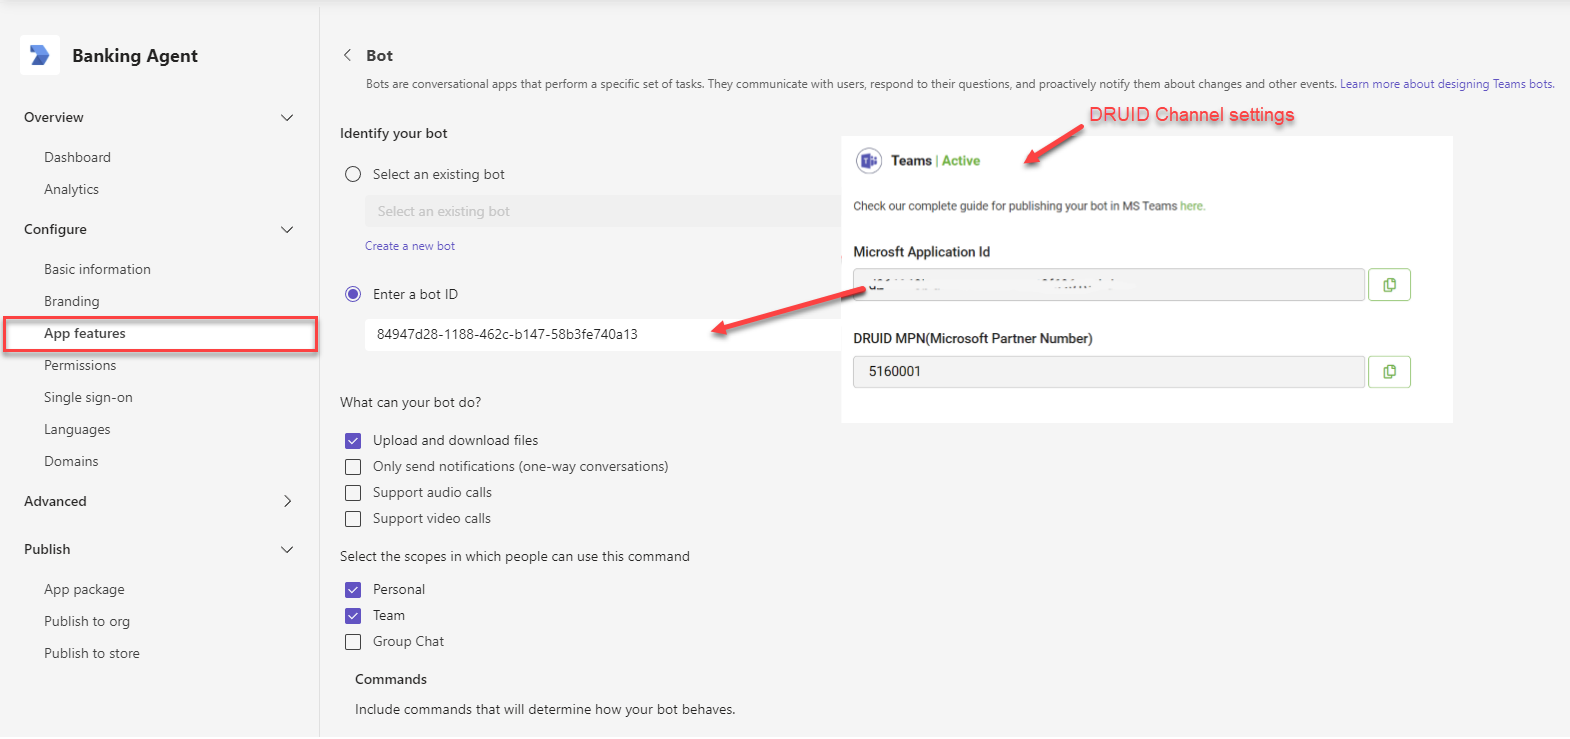
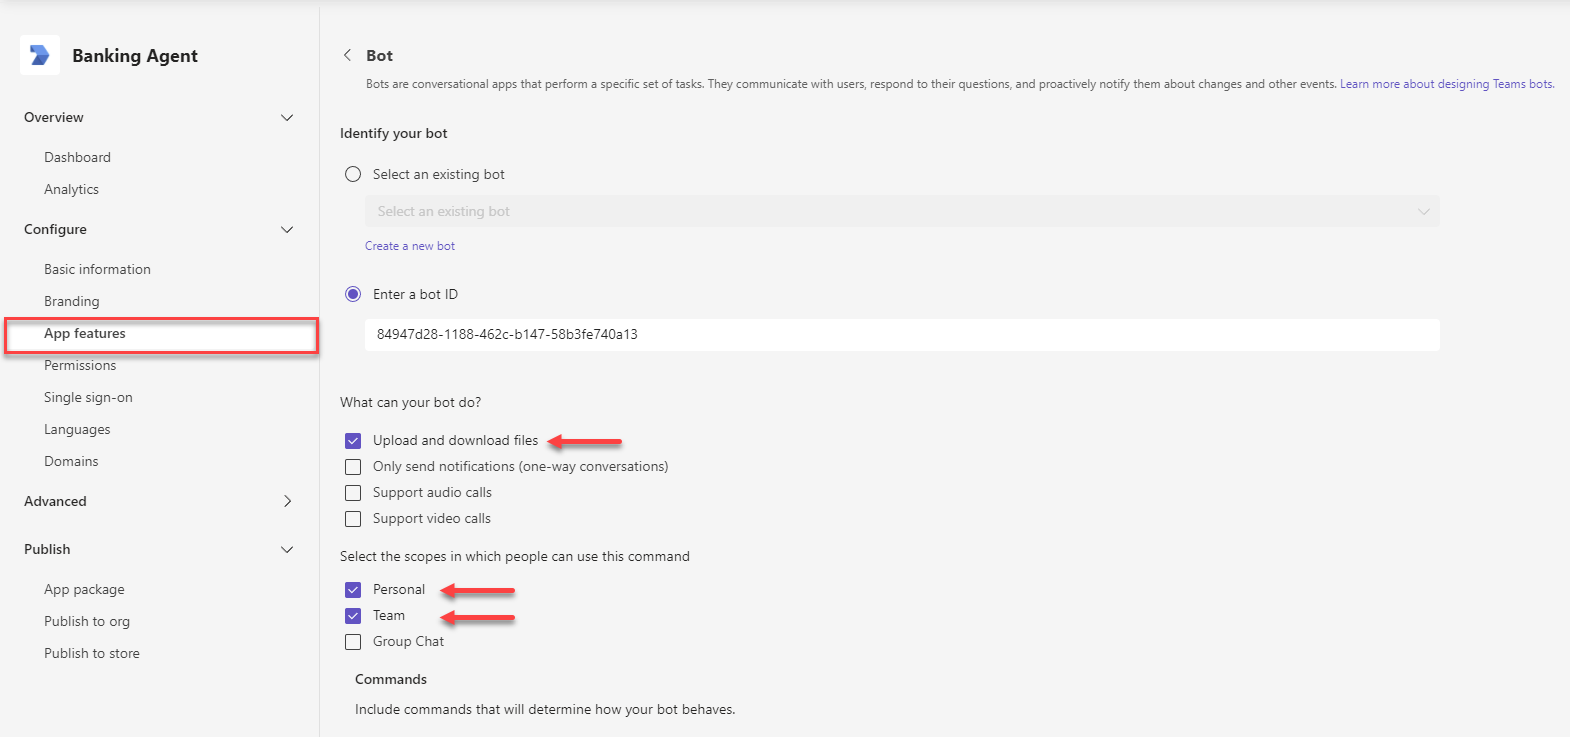
- From the Configure menu, click App features and on the right pane, click Bot.
- Tap on Enter a Bot ID and in the field below enter the Microsoft Application ID associated to your AI Agent (the one generated in Druid after the channel activation).
- Select the capabilities and scopes your AI Agent will need: Upload and download files, scopes Personal and Team.
- Scroll down and click Save.
- If you want your AI Agent to benefit the sensitive data manipulation:
- On the Configure menu, click Domains.
- Add the following domains:
token.botframework.com- Druid API domain that is specific to the Druid Cloud you're using:
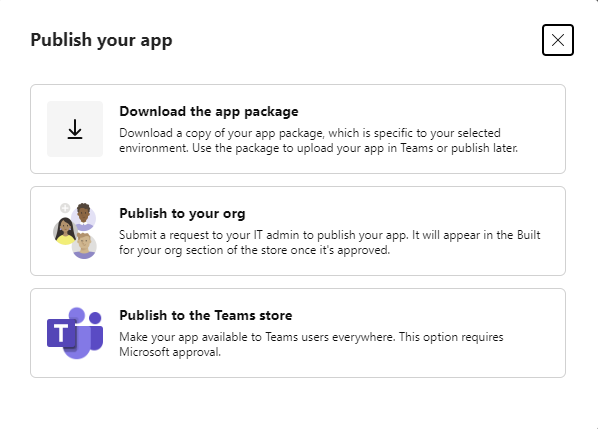
- At the top right corner of the page, click the Distribute button. A pop-up appears.
- Click Download the app package.
The Teams Developer Portal opens.
If Developer Portal isn't already installed, install it:
The app is now available when clicking … on the left menu.

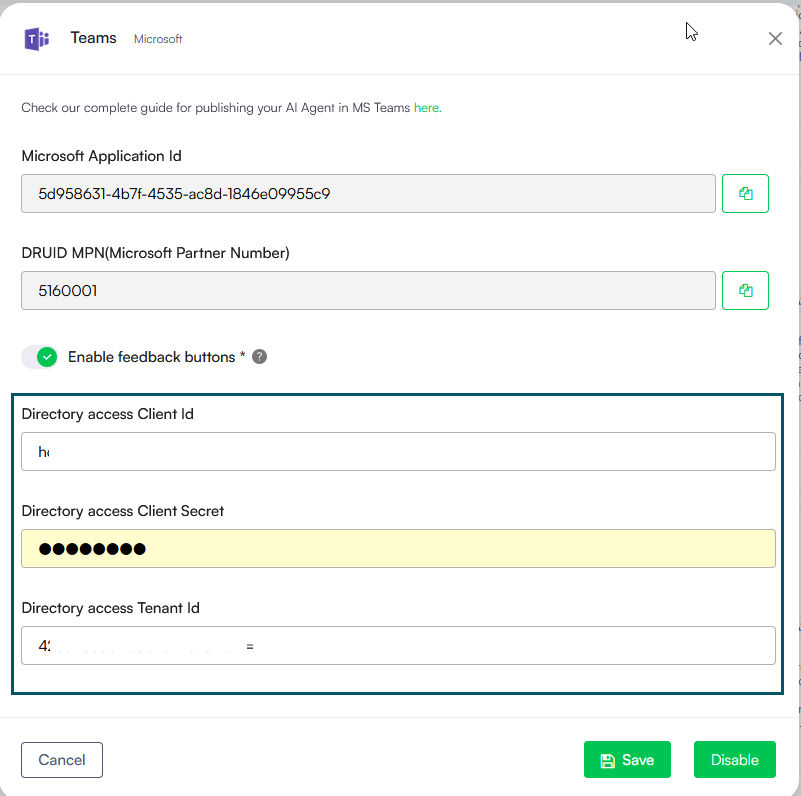
In the Microsoft Partner ID field, enter the DRUID MPN (the one generated in Druid after the channel activation).
| DRUID Community | PROD Europe | PROD US | PROD Australia |
|---|---|---|---|
druidapi.comm.eu.druidplatform.com
|
prod-DRUID-api.azurewebsites.net
|
druidapi.us.druidplatform.com
|
druidapi.au.druidplatform.com
|
The app package is successfully downloaded in your default download folder.
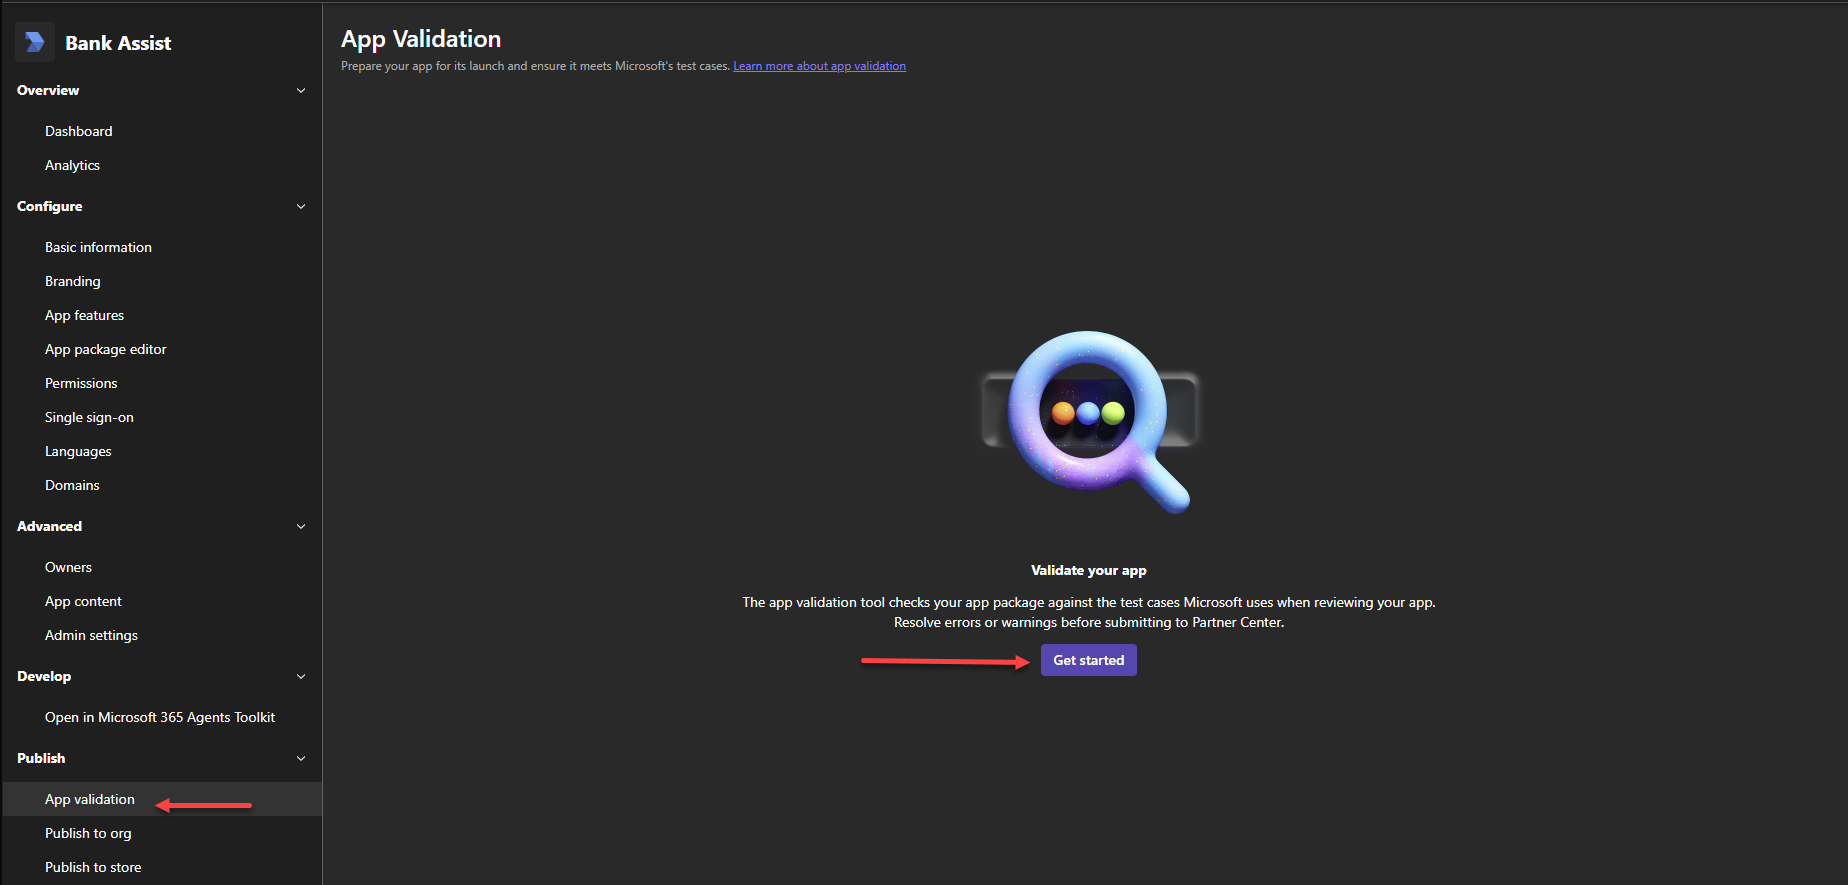
Step 3. Validate your app
To validate your app, follow these steps:
- From the Publish menu, click App validation.
- In the App Validation page, click Get Started.
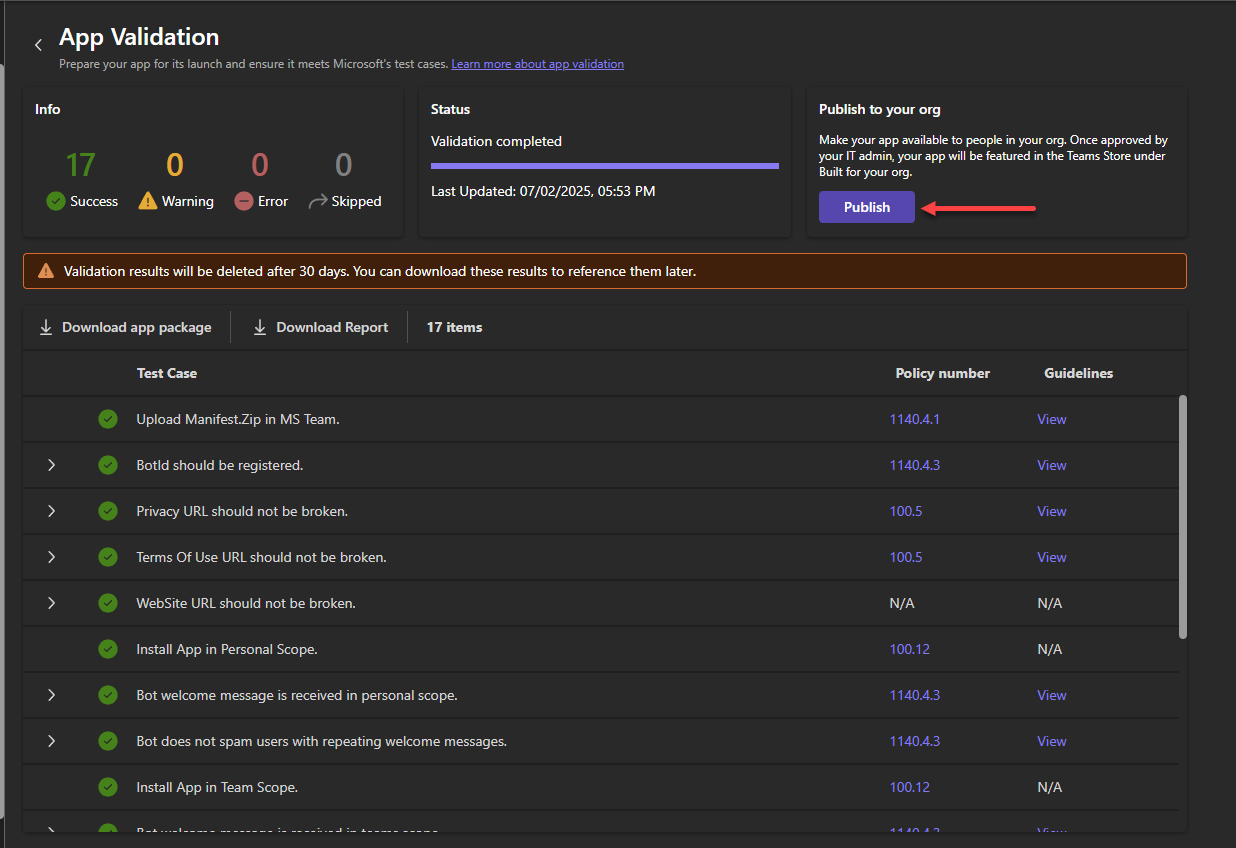
- Acknowledge the three steps on the screen and click Start validation.

When the app validation completes successfully, you can publish the app to your org, publish to the Teams store or install it in MS Teams.
Step 4. Install the AI Agent in a team in MS Teams
The AI Agent installation in MS Teams is done progressively (not instantly); so it might take up to 48 hours for the installation to complete depending on how many MS Team members you have.
During the AI Agent installation, the AI Agent appears to your Team members on the left menu and sends them the welcome message set on the AI Agent. If you want to prevent the AI Agent from sending the welcome message until its installation in MS Teams completes, temporarily disable the Welcome flow (in Druid Portal, go to the AI Agent details, section Dialogue management and leave the Welcome flow field empty).
To integrate the AI Agent in a MS team, in MS teams, from the left menu, click Teams. Right click on a team that you created and select Manage team.
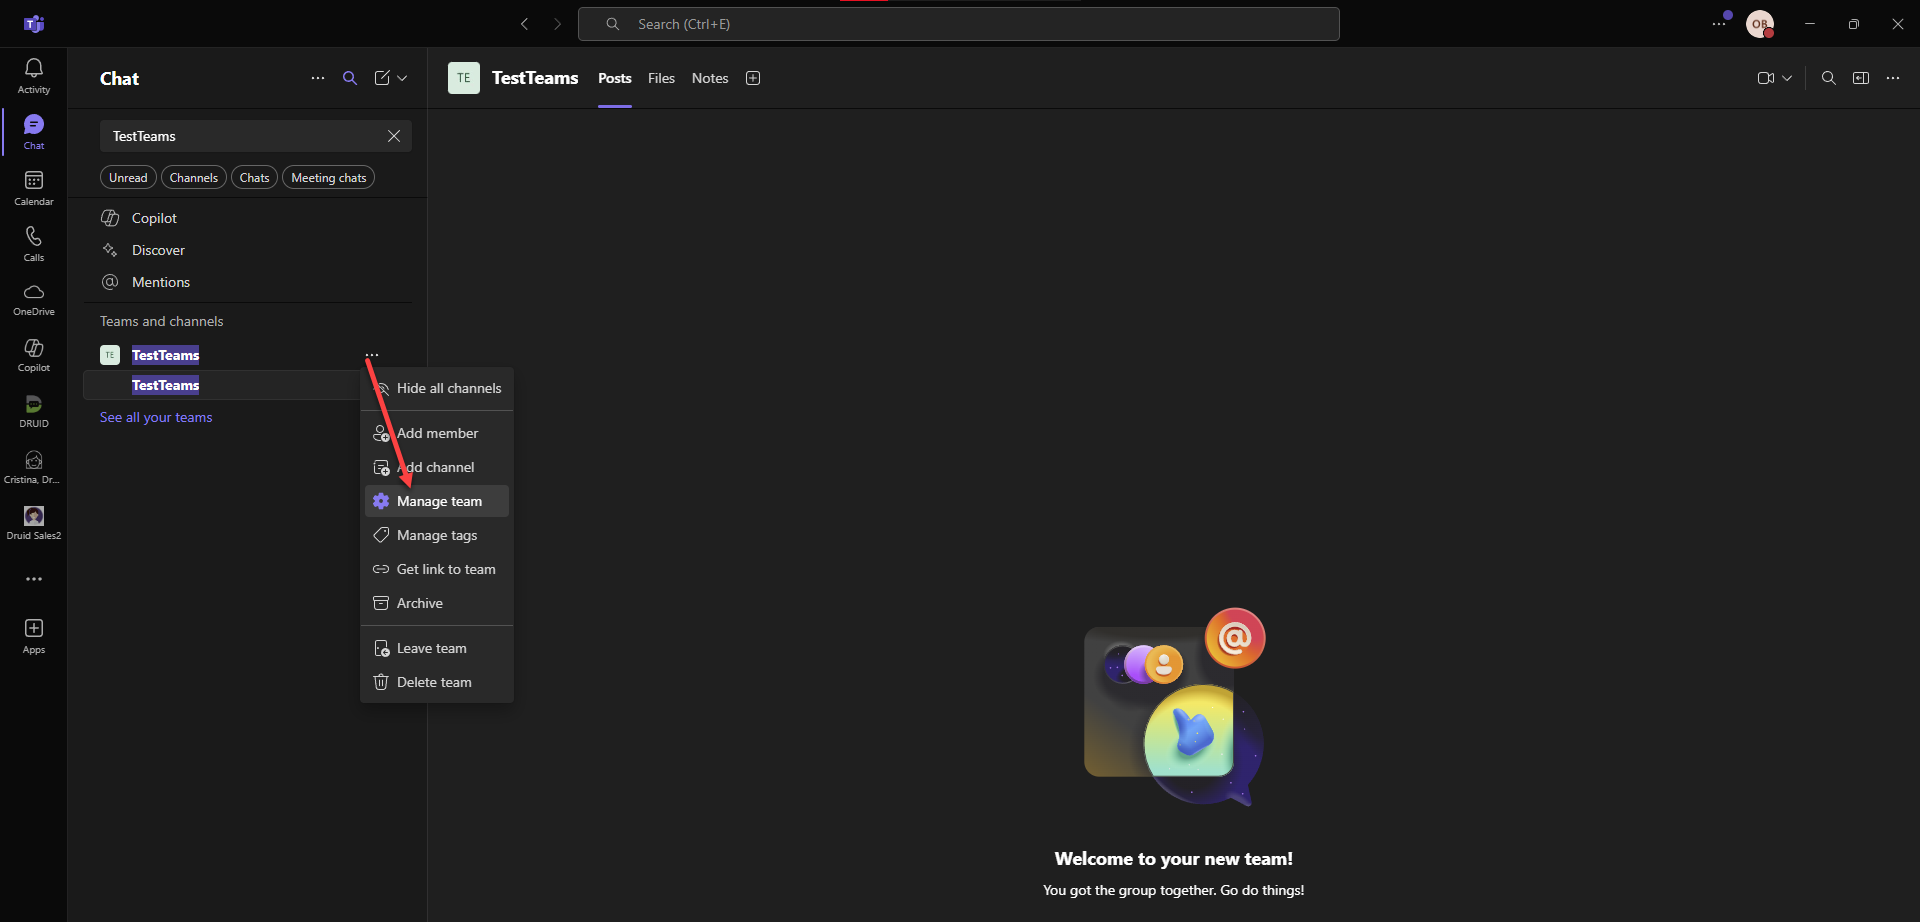
The Team page appears by default on the Members tab.
Click the Apps tab, then click Upload an app.
Browse for the app package you downloaded at Step 2, select it and click Open. If the Microsoft manifest passed, the AI Agent installation starts in the selected team.
Deploy an AI Agent in Teams at the organization level
Step 1. Prepare the App Package
Follow the Druid documentation (Step 2. Create a bot using Developer Portal and download the app package described in the previous procedure) to create the bot in the Teams Developer Portal and download the App Package (.zip file) as you normally would.
Step 2. Upload to the Organization Catalog
An MS Teams Administrator must perform these steps:
-
Go to the Microsoft Teams Admin Center.
-
In the left navigation, go to Teams apps > Manage apps.
-
Click the Upload new app button (or "Publish to your organization's app store").
-
Select the .zip file you downloaded from the Developer Portal.
-
Once uploaded, the AI Agent status will show as Published.
Step 3. Automatic Deployment (Setup Policies)
If you want the AI Agent to automatically appear in the left-hand sidebar for every employee (so they don't have to search for it):
- In the Teams Admin Center, go to Teams apps > Setup policies.
- Click on the Global (Org-wide default) policy (or create a new one for specific groups).
- Under Installed apps, click Add apps and search for your Druid AI Agent. This installs it for everyone covered by the policy.
- (Optional) Under Pinned apps, click Add apps to pin the Druid AI Agent to the Teams sidebar for all users.
- Click Save.
Key Differences to Remember
-
Scope: In the Developer Portal, ensure the Scopes in your manifest include Personal (for 1:1 chat with all employees) and Team (if you still want people to be able to add it to specific channels).
-
Permissions: Deploying at the organization level often requires Global Admin consent for any Graph API permissions the AI Agent might use (like reading user profiles).
-
Propagation Time: Organization-wide setup policies can take up to 24 hours to reflect on every user's Teams client.
Implement Role-Based Access Control via Microsoft Entra ID Groups
By default, Druid retrieves the user's name, surname, and email from Microsoft Teams. Starting with Druid 9.19, you can also retrieve the security groups the user belongs to. This allows you to create specialized flows based on user roles—for example, granting "Operational" users access to internal invoicing tools while keeping other users in an "Informational" only loop.
Step 1. Create an App in Microsoft Entra ID
To enable group retrieval, you must register a separate application in the Microsoft Entra admin center (formerly Azure Active Directory) to grant Druid permission to read directory data.
- Register a new application following Microsoft documentation.
- Ensure the application has the API Permission: GroupMember.Read.All (Application permission).
- Generate a Client Secret for this application.
- Copy the Client ID, Client Secret, and Tenant ID.
Step 2. Configure the MS Teams Channel in Druid
Navigate to your MS Teams channel configuration in the Druid Portal and provide the details from the Entra ID app:
- Directory access Client Id
- Directory access Client Secret
- Directory access Tenant Id
Step 3. How Group Data is Stored
Once configured and the channel is active, the groups associated with the user are automatically stored in the conversation context. The data is saved in a JArray format within the following system parameter: [[ChatUser]].SSOGroups.
Example data stored in this parameter: ["HR", "Financial", "Managers", "Invoicing_Team"]
You can use this parameter, [[ChatUser]].SSOGroups within your flows to branch logic. For instance, an AI Agent can check if [[ChatUser]].SSOGroups contains "Financial" before allowing a user to download invoices.
Limitations
MS Teams has a limited pagination for hero cards and buttons with repeater, as follows:
- For hero buttons with repeater, a bulk of 6 will be shown per page.
- For hero cards with repeater, a bulk of 9 will be shown per page.
Inactivating the channel
To inactivate the channel, go to the Channels page and turn off the Enabled toggle on the MS Teams card.